Good heavens, it's been a long time since I've posted! So sorry to have fallen off the radar like that. It's been a busy few months, and I haven't had much time to photograph or blog, although I have been doing some sewing.
Firstly, I have been meaning to post some photos of the gala dress actually on my body. I will know for future reference not to rely on Husband to be photo-man for events, particularly ones where I'd like shots of one of my creations. Noted. That said, I took a few snaps of myself wearing it, along with a few of the other recent completions. So, yeah, they were all taken today. No hair and make-up variety, but I did try to change up my background a bit here and there. :)


I purchased a mask from Michael's craft store to make a matching masquerade ball mask. I covered it in the same maroon satin fabric, used stick-on jewels (which I glued for stability) and painted the designs on with glitter glue. Just one one-piece feather thingamabob hot melted onto the back and some pretty ribbons. It wasn't terribly difficult, just a bit time consuming. But I was asked a few time how I managed to have a matching dress and mask, a people were genuinely surprised and impressed when I told them I'd made both items. Not so secretly, I love that. :)

Pardon all the wrinkles. The dress hasn't been cleaned and re-pressed since the event.
I should mention that the only change I made the original Burda design was to add bra cups sandwiched between the outer and lining layers. There was no possible way to wear an undergarment with a back that low, and even with my less than ample chesticular area, I thought it necessary to have a bit more modesty.
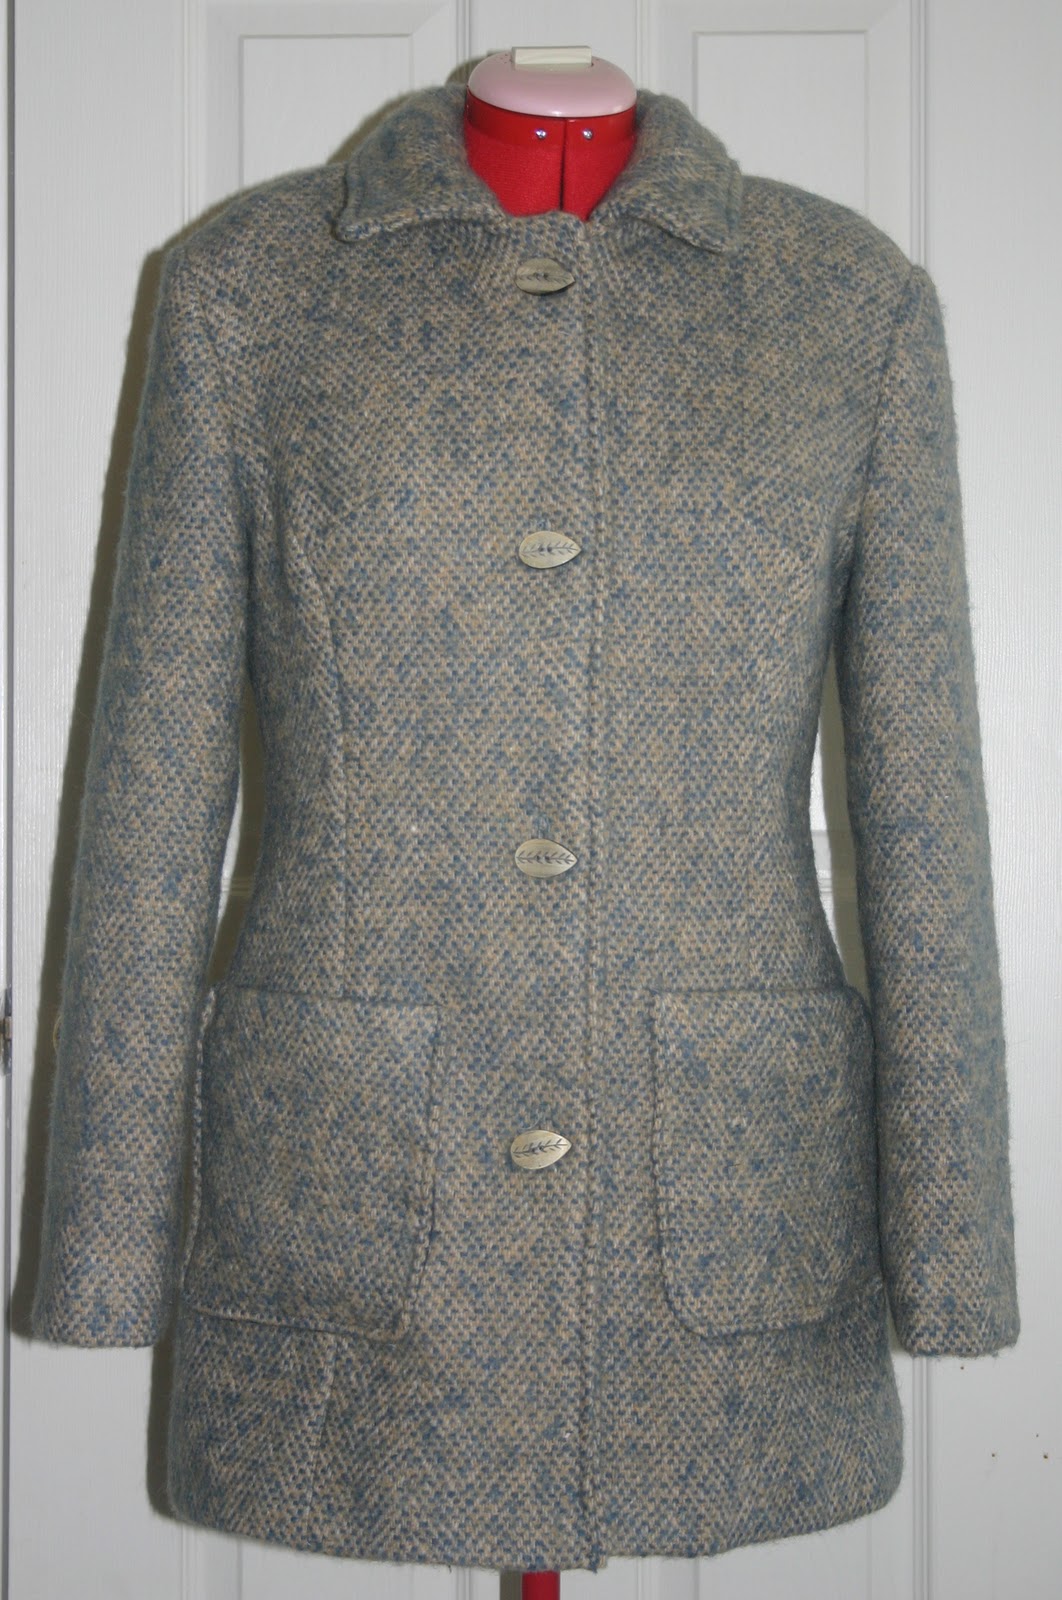
I did take a bit of break after I finished the dress. Although not particularly difficult, it was a time burner and the last few bits were a little fiddly. I guess I needed a little break, so I doubt I stepped foot in the studio for at least 2 weeks. Once I did finally get some mojo back, I started on McCalls 5668, which I've had cut forever and never bothered to put together. What better way to ease back in than with a project you don't even have to cut, right? I didn't bother with a muslin since it was just a cheapo moleskin from Joann Fabrics with a pretty swirly flowery design. I find, for the most part, that I can get away with a straight-out-of-the-envelope size 12. I count myself very fortunate for this, believe me.

I think it turned out very nicely, and I've already worn it twice. The only thing I changed on this pattern was to add a closure. The white shirt underneath was also a completed project, but it was in the laundry, and thus I could not photograph it for this post. Promise I'll throw it in somewhere else after I can get a photo.
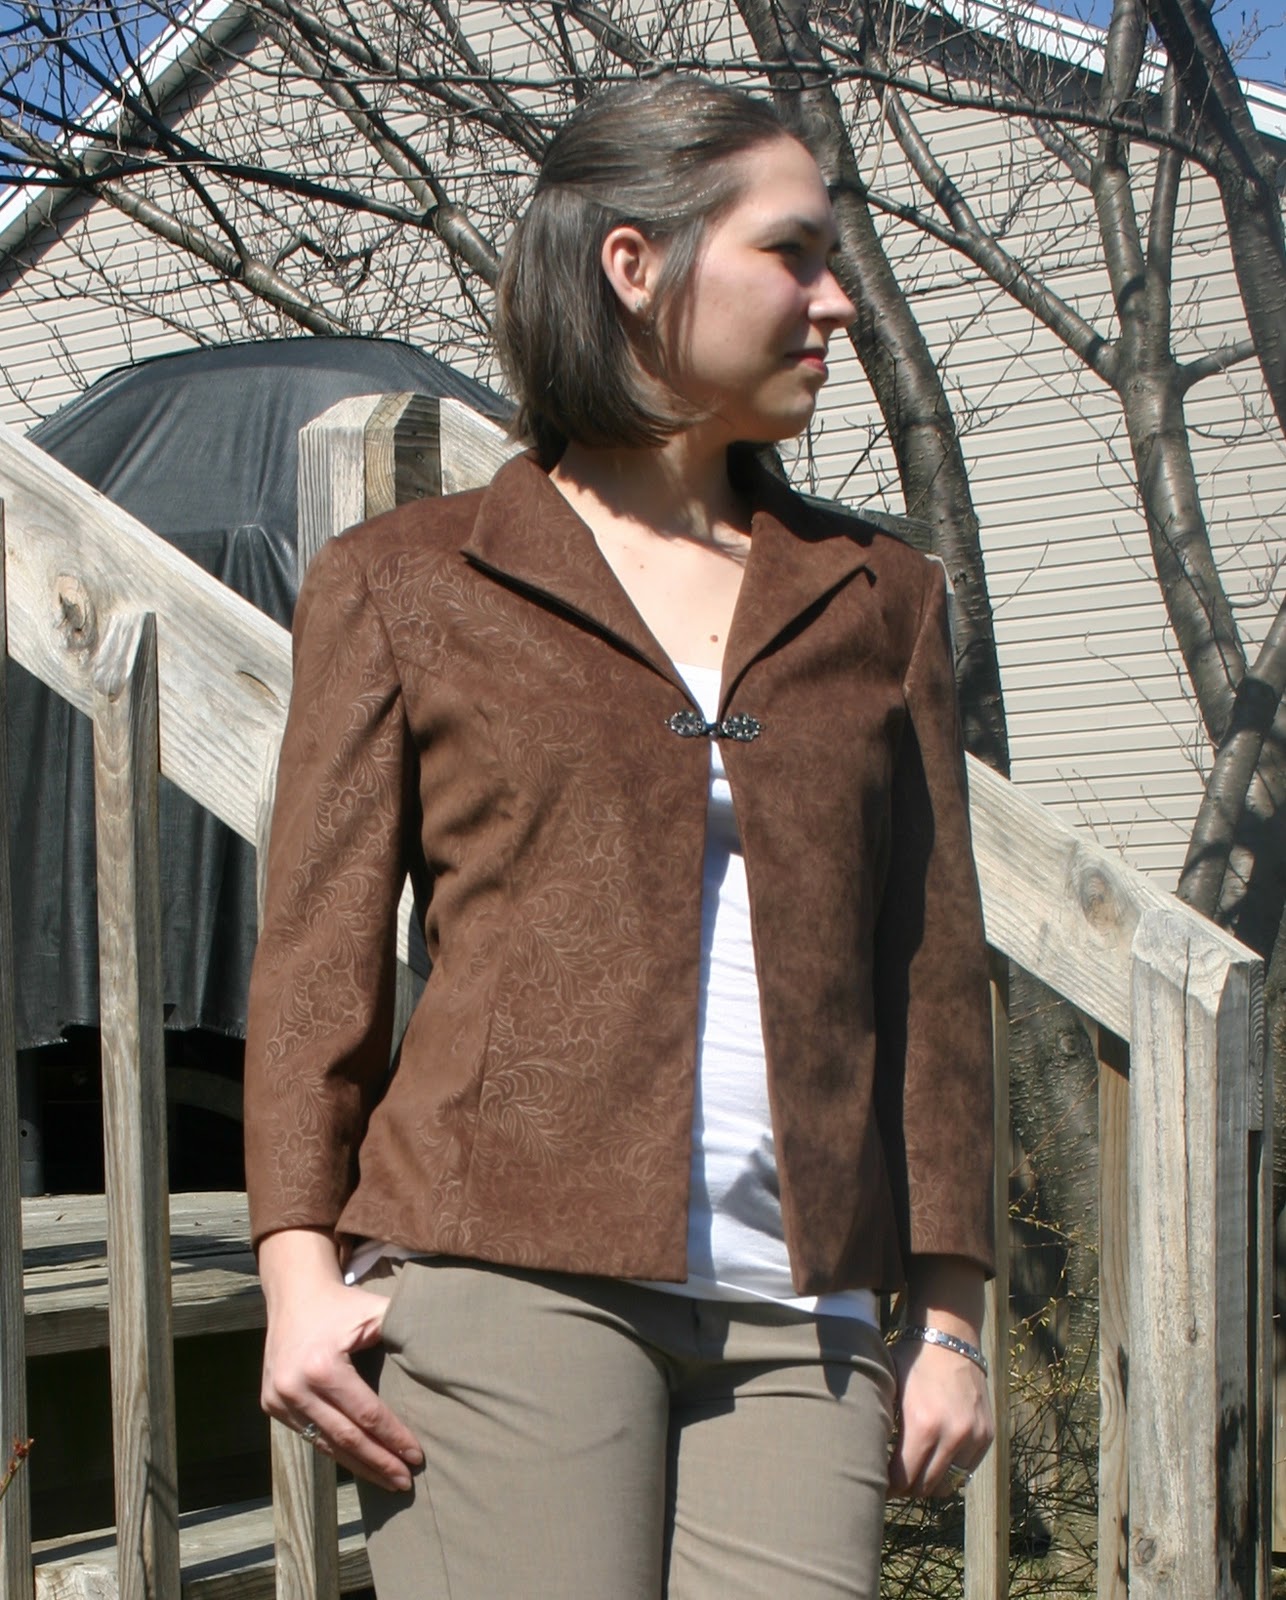
I threw this little skirt together in an evening. It was comes from a Butterick 5534 separates pattern and really lives up to its Fast and Easy title. It's a bit hard to see in the photos, but the fabric is a subtle blue/black plaid with a little stretch. It has to be 100% polyester based solely on the smell of it being steam pressed. I did add a full lining, which the pattern did not call for, and changed the lapped zipper to an invisible one.

 Please ignore the horrible fit of the RTW shirt I've paired it with. I won't attempt an excuse except to say that I won't wear it anymore after seeing the photos. Ick.
Lastly, sometime for the girl. Well, one of the girls. Lilly came home from preschool the Friday before St. Patrick's week in tears after her teacher told her she could wear something green on St. Patrick's day. The child who normally only allows me to dress her in pink (and the occasional purple or Disney/Nickelodeon character) was devastated that she didn't own a single green item. So, what is a sewing mom to do? We went down to Joann's, picked out some green printed cotton and flowery trim and whipped something up. I used Simplicity 2269 from my stash.


I had to re-do the squared front sections twice so they'd lay flat. It's taken a while, I think I can safely say I've mastered that skill now. It's super cute and she was completely in love with it. Not only did she wear green on St. Patty's Day, but she wanted to wear it again to church on Sunday. Maybe I've converted Little Miss Pink to include a bit more variety. Maybe it's just because it was a dress. She still won't wear jeans with anything that isn't pink. Oh well, I guess it could be worse! :)

Firstly, I have been meaning to post some photos of the gala dress actually on my body. I will know for future reference not to rely on Husband to be photo-man for events, particularly ones where I'd like shots of one of my creations. Noted. That said, I took a few snaps of myself wearing it, along with a few of the other recent completions. So, yeah, they were all taken today. No hair and make-up variety, but I did try to change up my background a bit here and there. :)


I purchased a mask from Michael's craft store to make a matching masquerade ball mask. I covered it in the same maroon satin fabric, used stick-on jewels (which I glued for stability) and painted the designs on with glitter glue. Just one one-piece feather thingamabob hot melted onto the back and some pretty ribbons. It wasn't terribly difficult, just a bit time consuming. But I was asked a few time how I managed to have a matching dress and mask, a people were genuinely surprised and impressed when I told them I'd made both items. Not so secretly, I love that. :)
 | |

Pardon all the wrinkles. The dress hasn't been cleaned and re-pressed since the event.
I should mention that the only change I made the original Burda design was to add bra cups sandwiched between the outer and lining layers. There was no possible way to wear an undergarment with a back that low, and even with my less than ample chesticular area, I thought it necessary to have a bit more modesty.
I did take a bit of break after I finished the dress. Although not particularly difficult, it was a time burner and the last few bits were a little fiddly. I guess I needed a little break, so I doubt I stepped foot in the studio for at least 2 weeks. Once I did finally get some mojo back, I started on McCalls 5668, which I've had cut forever and never bothered to put together. What better way to ease back in than with a project you don't even have to cut, right? I didn't bother with a muslin since it was just a cheapo moleskin from Joann Fabrics with a pretty swirly flowery design. I find, for the most part, that I can get away with a straight-out-of-the-envelope size 12. I count myself very fortunate for this, believe me.
I think it turned out very nicely, and I've already worn it twice. The only thing I changed on this pattern was to add a closure. The white shirt underneath was also a completed project, but it was in the laundry, and thus I could not photograph it for this post. Promise I'll throw it in somewhere else after I can get a photo.
I threw this little skirt together in an evening. It was comes from a Butterick 5534 separates pattern and really lives up to its Fast and Easy title. It's a bit hard to see in the photos, but the fabric is a subtle blue/black plaid with a little stretch. It has to be 100% polyester based solely on the smell of it being steam pressed. I did add a full lining, which the pattern did not call for, and changed the lapped zipper to an invisible one.


Lastly, sometime for the girl. Well, one of the girls. Lilly came home from preschool the Friday before St. Patrick's week in tears after her teacher told her she could wear something green on St. Patrick's day. The child who normally only allows me to dress her in pink (and the occasional purple or Disney/Nickelodeon character) was devastated that she didn't own a single green item. So, what is a sewing mom to do? We went down to Joann's, picked out some green printed cotton and flowery trim and whipped something up. I used Simplicity 2269 from my stash.
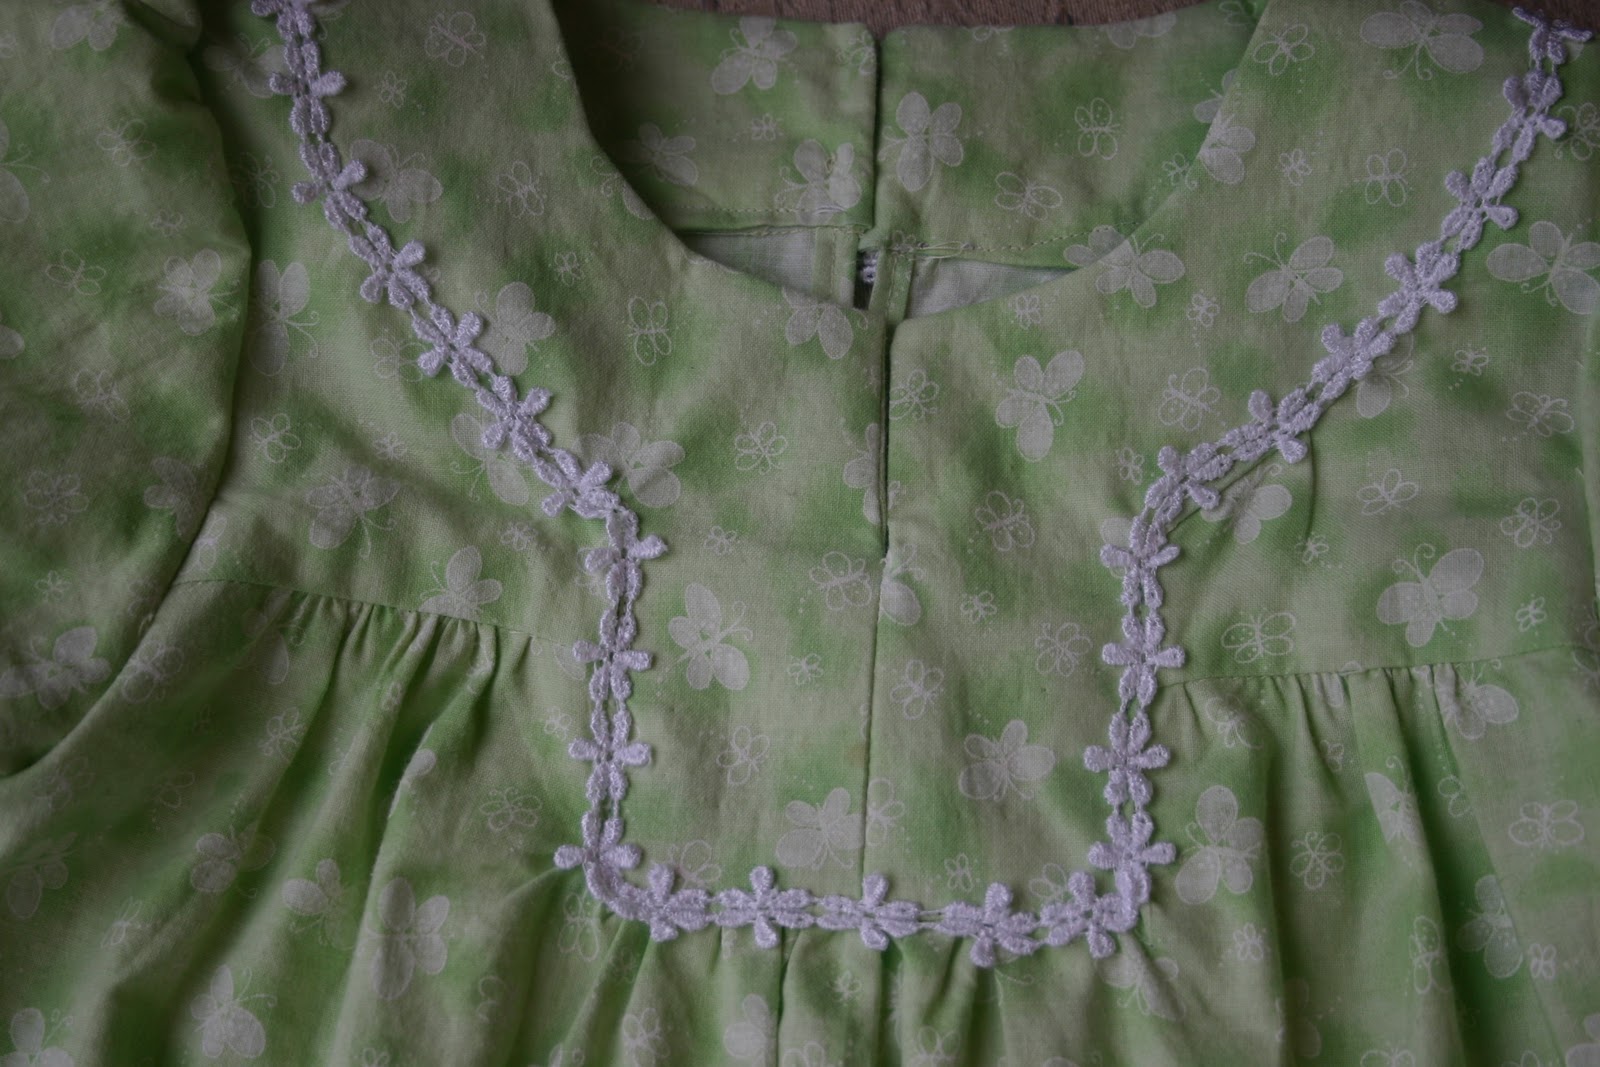

I had to re-do the squared front sections twice so they'd lay flat. It's taken a while, I think I can safely say I've mastered that skill now. It's super cute and she was completely in love with it. Not only did she wear green on St. Patty's Day, but she wanted to wear it again to church on Sunday. Maybe I've converted Little Miss Pink to include a bit more variety. Maybe it's just because it was a dress. She still won't wear jeans with anything that isn't pink. Oh well, I guess it could be worse! :)

So, yeah. That's what I've been up to for the past two months. This weekend I'm headed out to a cabin with some girlfriends of mine about an hour from home. It's traditionally a scrapbooking getaway, but since I've converted my friend (who happens to be the organizer) she's made into a Scrap-n-Sew. I have to haul my machine and supplies, but who cares! Imagine -- a whole weekend with no husband, no children, no distractions (well, except for the hot tub and copious amounts of alcohol), just lots of sewing (and maybe some scrapping) time! I'll be sure to take the camera to document my (hopefully) productive 2 days away.
Until then... Happy sewing to all!